Manage employee accounts and roles
ENVIRONMENT: Datto Partner Portal
This article discusses how a Partner Portal Administrator can create, manage, and delete employee accounts in the Datto Partner Portal. Only Portal Administrators can access employee management options.
A Datto Partner Portal Administrator can create employee accounts, with various access levels in the portal, so the employees can manage and service Datto devices accordingly. Employee accounts created in the portal can be easily granted access to Cloud Continuity, Business Continuity & Disaster Recovery, SaaS Protection store and SaaS Protection NFR accounts. In addition, employees can also be configured to use the same username and password to access other Datto products like RMM and Workplace.
- Only Portal Administrators can access the Manage Employees page.
- Only use the Manage Employees page to give your employees Partner Portal access.
- To give your customers access to the Partner Portal, use the Manage Organizations page.
- Employee account passwords expire after 90 days of inactivity.
- Datto does not recommend using shared accounts, as this is not a secure practice.
How to...
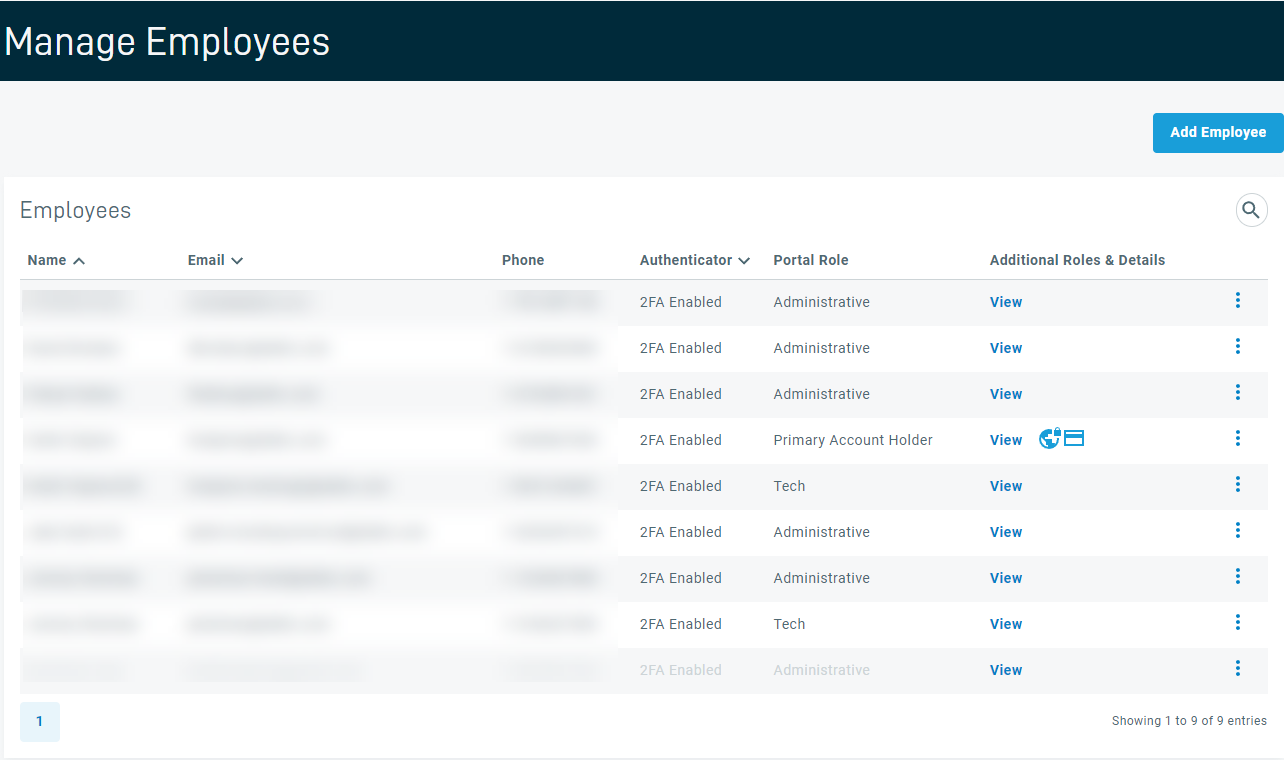
In the Datto Partner Portal, navigate to Admin > Manage Employees.
On the Manage Employees page, you can:
- Search for employees by name or email address
- View employees' assigned roles.
- Create, edit and delete employees.
Searching for employees
-
To search for an employee, begin typing their name or email address into the search bar in the top right-hand portion of the screen.
Sorting employees
-
You can sort employees by name or email address, in ascending and descending order.
Viewing employee roles
-
Click the chevron next to an employee to view their assigned roles.
Refer to Datto Partner Portal: For an in-depth look at employee roles and access levels, refer to Employee roles and access level permissions
NOTE Newly created users have seven days to set up their multifactor authentication and password. After that time period, the system will automatically deactivate their accounts. Security Admins can re-activate employee accounts if this occurs.
-
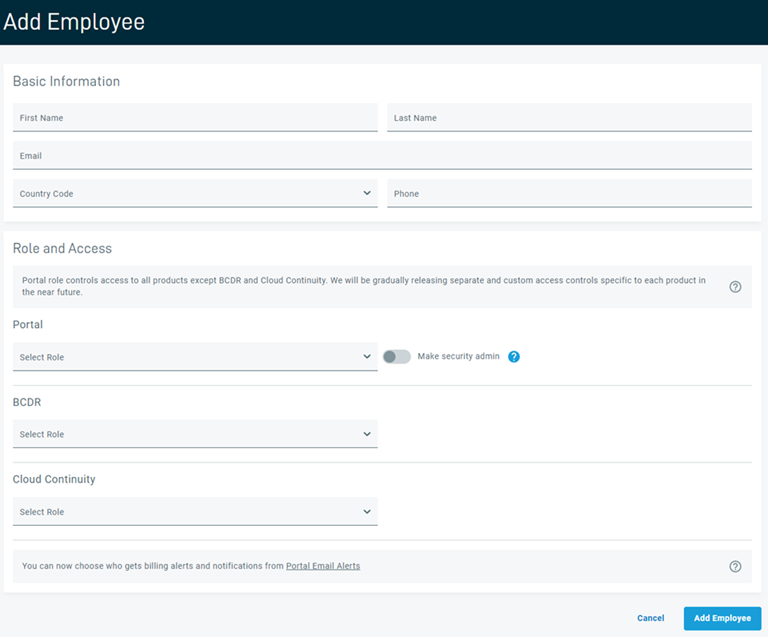
The Add Employee dialog box will appear. Fill out the employee's personal information, then select the drop-down menu for Portal to choose the employee's role. See the Employee Roles section of this article for more information.
- By default, the Administrator role has full access for Cloud Continuity and BCDR.
- By default, the Tech role has full access for BCDR. This role may also be limited with read-only access.
- By default, the Business and Sales & Marketing roles have no access to BCDR and Cloud Continuity.
- You can change the default selection to allow any combination of access necessary.
-
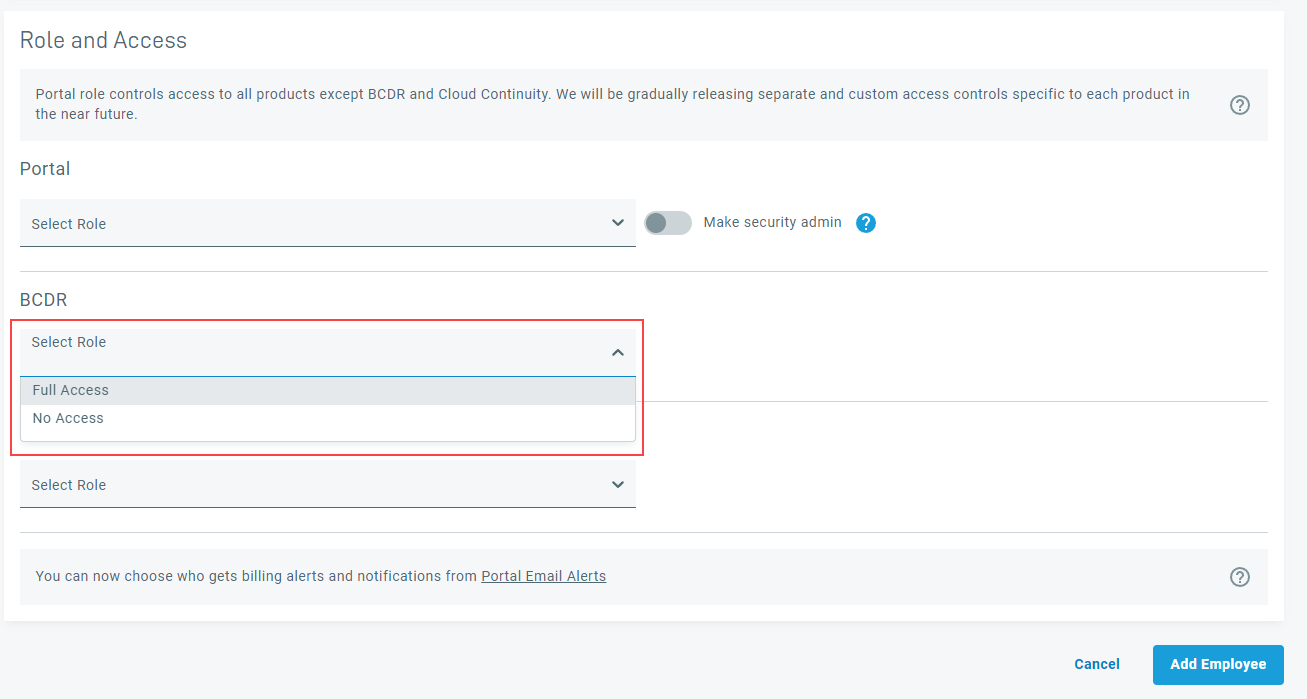
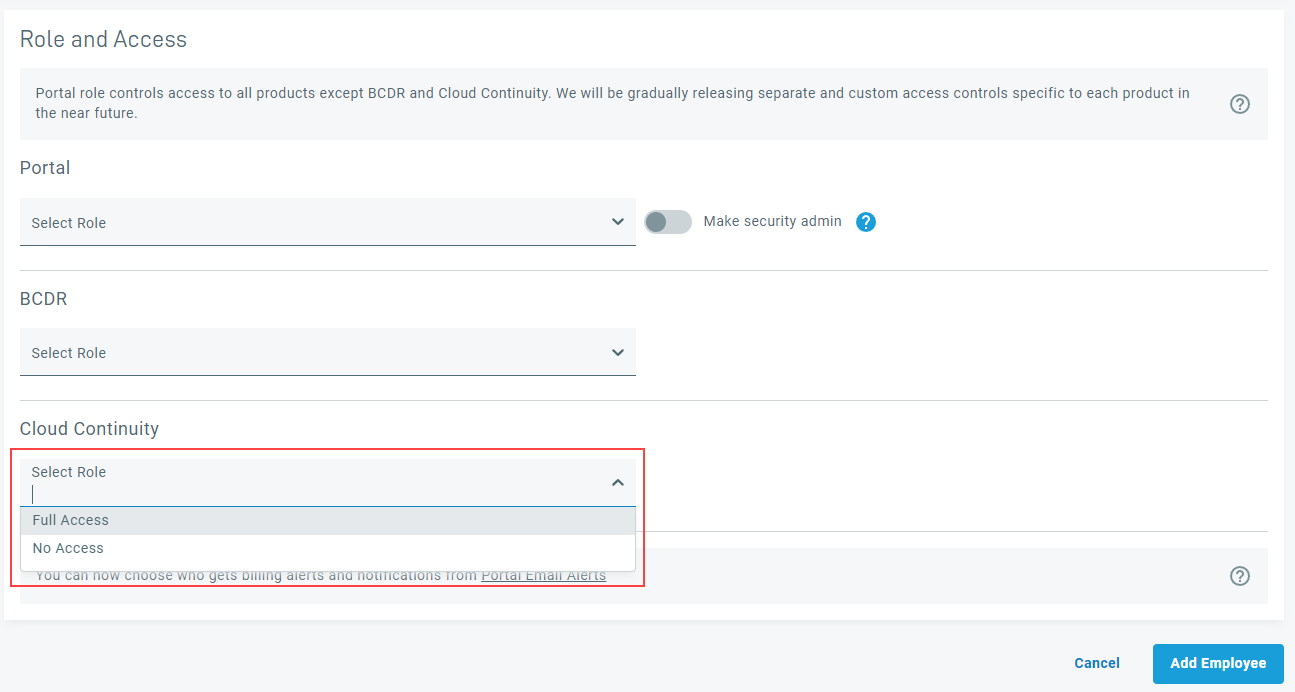
Use the corresponding drop-down menu to select whether the new employee will have No access or Full access to BCDR and to Cloud Continuity.
- Selecting Full Access will grant the user total access to that status page.
- Selecting No Access will hide that status page from the user.
The Portal drop-down menu for BCDR product access levels:
The Portal drop-down menu for Cloud Continuity access levels:
Employee access levels directly from the Manage Employees page.
-
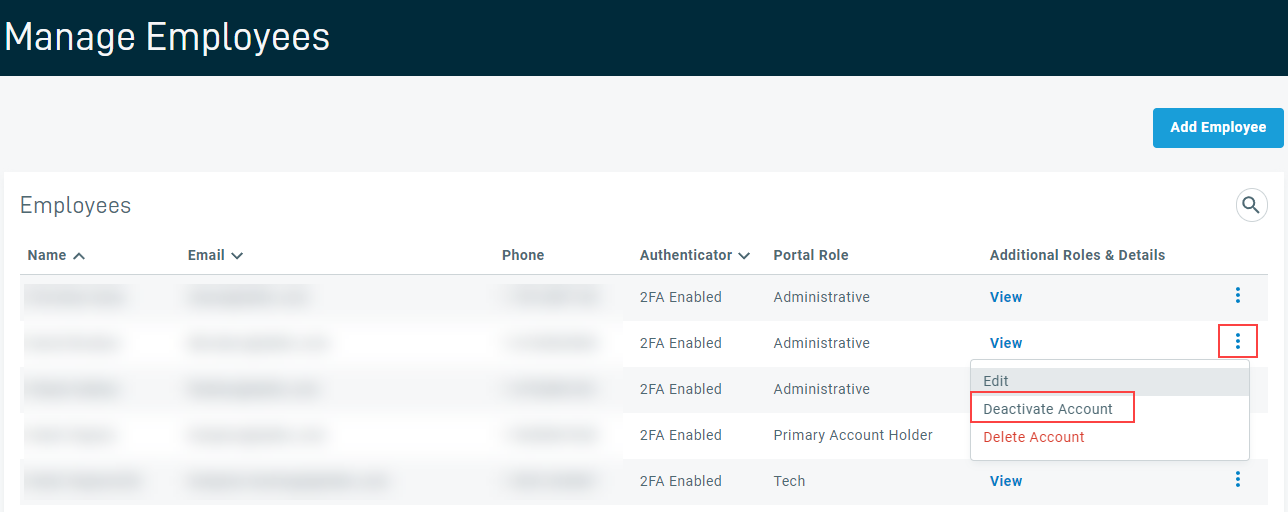
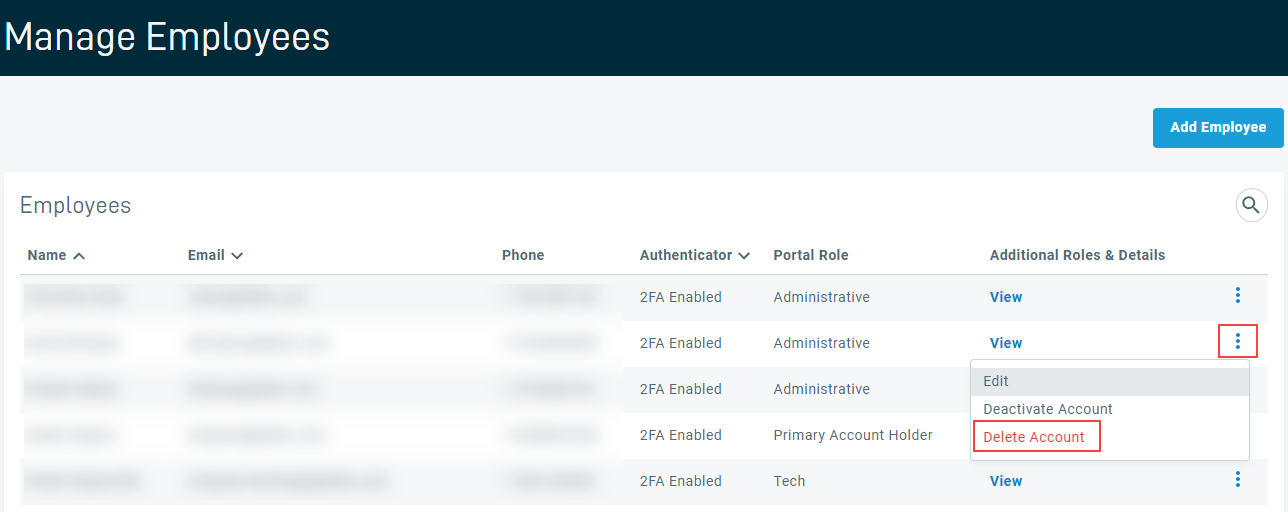
Click the ellipsis icon next to the desired employee, then click Edit.

-
The Edit Employee dialog box will appear. Make the necessary changes, then click the SAVE CHANGES button.
Many options cannot be blank as designated by the *. The following may be updated:
- First Name
- Last Name
- Country Code / Phone Number
- User Role and Access
For more information on the User Role and Access: Employee roles and access level permissions
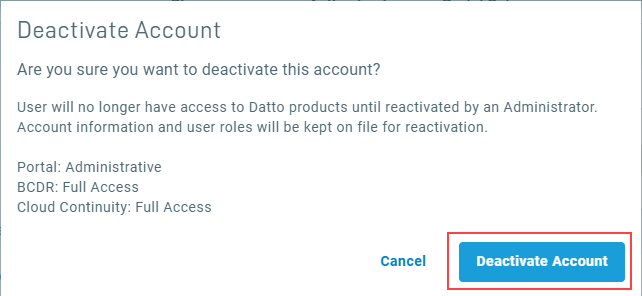
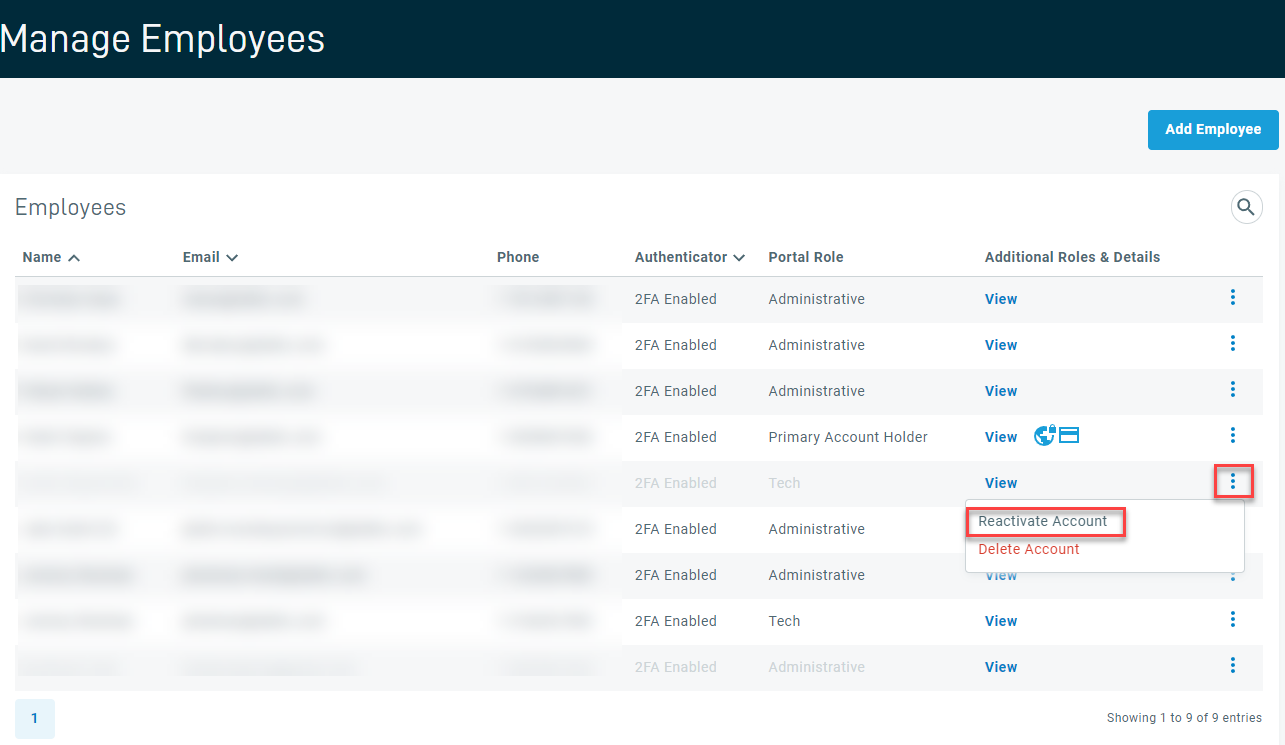
Deactivated accounts cannot log into the Partner Portal or use any of the Portal's features, but their account details remain saved pending future reactivation.
Only a Security Admin, or the primary account holder, can deactivate another Security Admin.
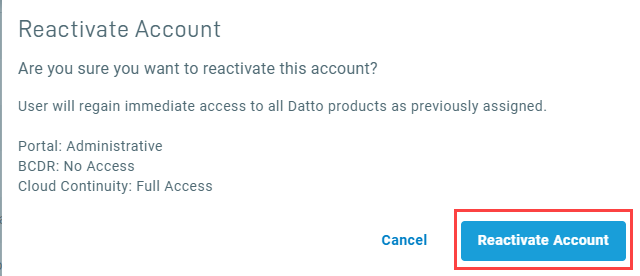
Click the Reactivate link for the employee you wish to reactivate.

